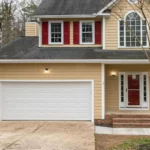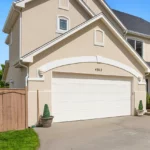

Garage Door Opener Gear and Sprocket Replacement
At Firstline Garage Door, we understand the intricate mechanisms behind your garage door’s operation. Gear and sprocket systems play a pivotal role in ensuring smooth functionality, transferring power from the motor to the door. Over time, wear and tear can compromise these components, necessitating replacement.

Signs of Wear and Tear
Recognizing signs of wear is crucial in addressing potential issues with your gear and sprocket system. Listen for grinding noises during operation and observe any irregular door movements, as these may indicate wear and tear. Prompt identification allows for timely intervention, preventing further damage.
Expert Inspection and Assessment
Trust the expertise of our seasoned professionals at Firstline Garage Door. Our thorough inspections and assessments accurately diagnose the root cause of your garage door's issues. With our tailored solutions, we address your specific needs, ensuring optimal functionality and reliability.
Who Can Benefit from this Service
- New homeowners or tenants moving into a residence equipped with a garage door opener.
- Individuals replacing malfunctioning remotes or seeking upgrades.
- Property managers overseeing maintenance for multiple units.
- Enthusiasts seeking to modernize their garage door opener.
- Security-conscious individuals aiming to enhance the safety features of their property.
Table of Contents
Firstline Garage Door Repair Services
Precision Replacement Services
When replacement becomes necessary, our skilled technicians at Firstline Garage Door are ready to assist. Utilizing premium replacement parts and advanced tools, we execute precise procedures tailored to your garage door’s specifications. Our goal is to restore functionality and reliability, ensuring seamless operation.
Comprehensive Testing and Quality Assurance
Following replacement, we conduct comprehensive testing to verify optimal performance. Every aspect of your garage door's operation, from motor functionality to door movement, is meticulously examined. Our commitment to quality assurance guarantees flawless operation and your peace of mind.
Customer Satisfaction Guaranteed
At Firstline Garage Door, customer satisfaction is our top priority. From initial inspection to final testing, our dedicated team ensures a seamless and stress-free experience. We strive to exceed your expectations at every step, providing unparalleled service and reliability. Contact us today to experience the Firstline difference.
Thorough Assessment and Diagnosis
Before proceeding with replacement, we conduct a thorough assessment of your garage door's gear and sprocket system. This ensures that we accurately diagnose the root cause of the issue and recommend the most effective solution. Our meticulous approach guarantees optimal results and long-term performance.
Explore Our Comprehensive Services
Discover a wide range of expert garage door solutions tailored to your needs. From installations to repairs, our professional services ensure smooth operations and enhanced security for your home or business. Trust our team for reliable craftsmanship and exceptional results.


Top-Requested Garage Door Services in Chicago
Firstline Garage Door specializes in offering comprehensive garage door repair and maintenance services in Chicago. Our expertise encompasses a range of solutions designed to ensure the safety, functionality, and aesthetic appeal of your garage doors. From regular inspections to emergency repair services, we’ve got you covered.
- Regular Inspection and Maintenance
- Fast Repair of Broken or Damaged Doors
- Installation of High-Quality Garage Doors
- Emergency Repair Services


First Line Garage Door Repair
Professional and Reliable Service
At Firstline Garage Door, we take pride in delivering professional and reliable service to our customers. We understand the importance of a functional garage door for your daily convenience and security. Our friendly and knowledgeable technicians are committed to providing timely responses, flexible scheduling, and efficient repairs.
Take the Next Step Towards Enhanced Convenience and Security
Step into a world of enhanced convenience and security with our expert programming services at Firstline Garage Door. Don’t let an unprogrammed or malfunctioning remote disrupt your daily routine. Connect with us today, and let us tailor your garage door system to align seamlessly with your lifestyle. Experience the transformative impact of professional service coupled with unparalleled customer satisfaction.